Composition Manager#
The “Package Content” window is where you compose your package by creating Composition Playlists (CPL). When starting off with a new project, you can already see the first CPL with an empty Reel.
A CPL is comprised of one or more Reels that will be seamlessly played back-to -back, i.e. when played there are no gaps in-between Reels. There is no preference to a multi-Reel CPL over a single-Reel CPL. Use whatever option is more convenient to you.
Add Composition#
If you want to place more than one composition in your package, you can create additional compositions. To achieve this, just click the “+” (“Add Composition”) button on the right side of the composition.
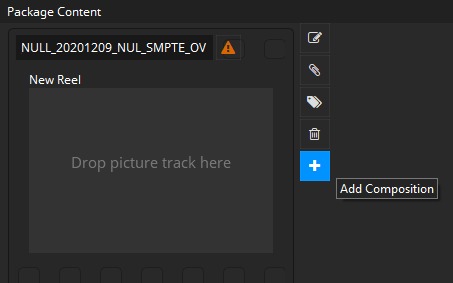
easyDCP Creator will create a new composition in the Reel Window.
Add Tracks to Composition#
To add a Track to a Reel, simply drag & drop the Track from the Track manager into the desired Reel. All Tracks within a Reel will be played in parallel to each other.
Each Reel needs to contain at least a picture Track, but typically it will also contain an audio Track. A Reel may have zero, one or more timed text Tracks, provided they all use distinct display type (Open/Closed Subtitles/Caption). For instance, a single Reel may contain an Open Subtitle Track and a Closed Caption Track. It may not contain more than one Open Subtitle Track.
The first Track that is added to an empty Reel needs to be a Picture Track. If you try to place a Sound or timed text Track into an empty Reel, the action will be ignored.
When adding a Track to a Reel that already contains a Track of the same type, the existing Track will be replaced with the new one.
After placing a media Track in an empty Reel, a new empty Reel placeholder is
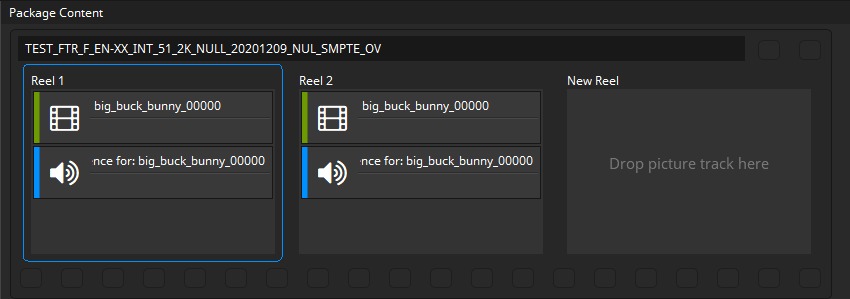
automatically appended at the end of the CPL. As long as there is no content in the Reel, it is called “New Reel” and it will not end up in the rendered DCP. You can place additional media Tracks in the new Reel. All Reels will be combined into a Composition in the package later.
Change Offset (EntryPoint) and Duration#
In some cases you may want to crop the beginning and/or end of a Track. Double-click a Track within a Reel to change its offset or duration:
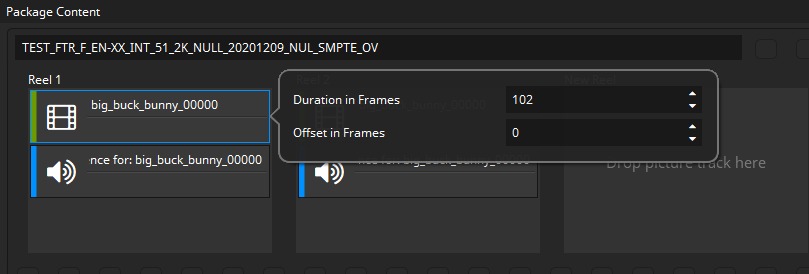
Skipping frames at the beginning can be done by changing the offset to a value (in frames) larger than zero. If you want to hide the first two seconds of a Track with an edit rate of 24 fps, set the offset to 48.
If you want to truncate the Track, decrease the duration. Example: Your Track has an intrinsic duration of 100 frames. You want to hide the first 10 and last 20 frames. Then you would set the offset to 10 and the duration to 70 (100-10-20=70).
The In- and Out-markers as defined by the offset and duration are displayed in the Preview Window’s timeline when a single Track within a Reel is selected:

There are various further use cases where the offset and duration properties might be convenient.
Use case: Cut Scene
You can even use this option to cut a scene from a Track. To do that add the same Track to two consecutive Reels. Set up the duration of the Track in the first Reel, so that it stops just before the scene that you want to cut out starts. In the second Reel, set the offset of the Track so that it starts just after the scene is over.
Use case: Insert scene
Also, you can add an insert. Assume you have a Track that contains the entire movie, but you want to add a pause in the middle and show a message, you could create a JPEG with the message and create a new still-picture Track from that JPEG. Put the main movie Track in the first Reel, the pause Track in the second Reel and again, the main movie track in the third Reel. Assuming your main audio and picture Tracks are each 90 minutes long, they have an intrinsic duration of 129600 frames given an edit rate of 24 fps (90x60x24=129600). In the first Reel, decrease the duration to 64800 (129600/2=64800) and in third Reel, set the offsets to 64800.
Use case: shift audio and video relative to each other
Assume your picture Track has a film leader showing a count-down with a duration of a 100 frames, but your audio Track’s leader only has a duration of 80 frames. In this case, you can set the picture Track’s offset to 100 and your audio Track’s offset to 80. Now you have shifted the two Tracks relative to each other and they will be in sync.
Move Content within Compositions and to other Compositions#
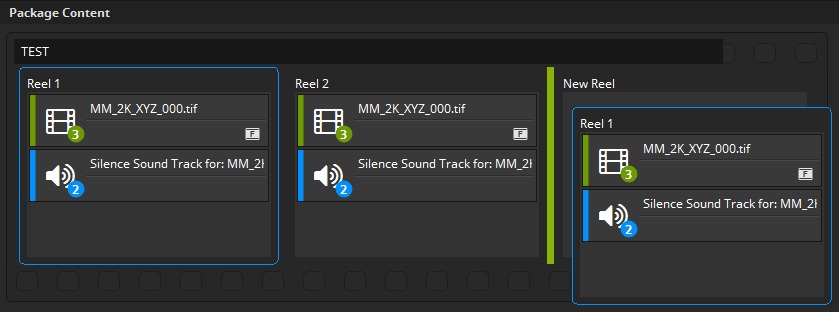
You can easily move Reels within a Composition using drag & drop. Just click on a Reel with the left mouse button and hold the button down. Then move with the mouse to the new position for the Reel and release the mouse button. The positions where you can place the Reel are getting highlighted with a green bar when moving over with the mouse.
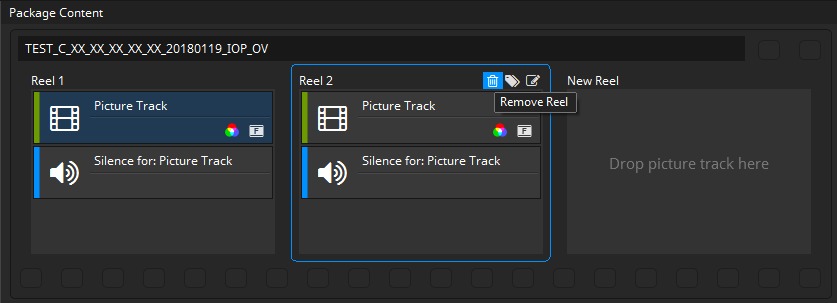
Delete Reel#
Choose the Reel you want to remove from the Composition and click the trash can symbol button in the Reel’s tool bar. You can also select a Reel and hit the shortcut “Del”. The selected Reel is indicated by a blue border:
Editing Composition Properties#
You can easily edit the properties of your Composition by double clicking it or
by clicking the Edit-icon on the right of the CPL.
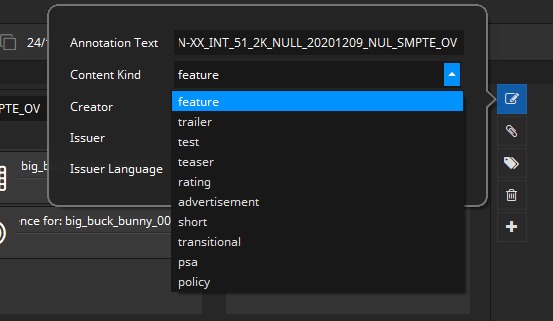
Content Kind of a Composition#
The content kind is informational only. It defines the kind of material referred to by the Composition playlist. The content shall match one of the values listed in the table below. This kind may be displayed to the operator in the cinema server. Some servers sort their DCPs and playlists by content kind so that the projectionist can easily find trailers, advertisements or feature films.
Kind |
Description |
|---|---|
feature |
A theatrical feature. |
trailer |
Short (2 to 3 minutes) content promoting an upcoming theatrical feature. |
test |
Content used to test, calibrate or setup D-Cinema exhibition equipment. |
teaser |
Very short (typically less than 1 minute) content promoting an upcoming theatrical feature. |
rating |
Slate/still picture indicating the recommended age group permitted to view the content to follow. This rating is generally unique per country. |
advertisement |
Content promoting a product or service other than an upcoming feature. |
short |
Non advertising/promotional content (3 to 15 minutes) typically before a theatrical feature. |
transitional |
Extremely short content (1 to 15 seconds) separating unrelated Compositions. |
psa |
Public service announcement. |
policy |
Content defining the code of conduct for patrons. |
To edit the content kind of a Composition, double click or click the “Edit Composition Parameters” button and select a kind from the dropdown list.
If you typically create DCPs of the same content kind, it is convenient to change the Default CPL Content Kind in the Options dialog.
Content Title#
The Content Title appears on the screen if a volume (e.g. USB-Drive, Hard disc Drive) is connected to a digital cinema system before ingest. This annotation text describes the whole DCP. In contrast to the Annotation Text of the Composition (CPL Annotation Text) it describes the whole DCP. Some Digital Cinema servers only show a limited number of characters on their display screens. If the title of a composition is long, much of the information may be cut off or not visible unless you scroll to a second page. This makes locating a specific composition difficult if you have multiple titles. It’s especially confusing when you have multiple trailers as well as the feature with the same name. You should follow the Digital Cinema Naming Convention at www.digitalcinemanamingconvention.com
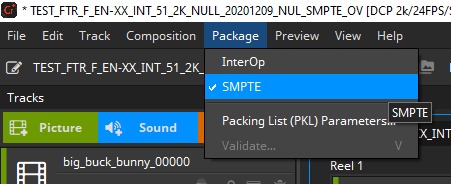
Conformity: InterOp or SMPTE#
You already selected the conformity of your DCP project in the “New Project Settings” windows. In the Compose view you can optionally change this setting via the main menu bar:
Neither an InterOp nor SMPTE DCP will work in a so called “E-Cinema” system.
If you do not have a tangible reason to switch to Interop conformity, we recommend using SMPTE as conformity mode.
Delete Composition#
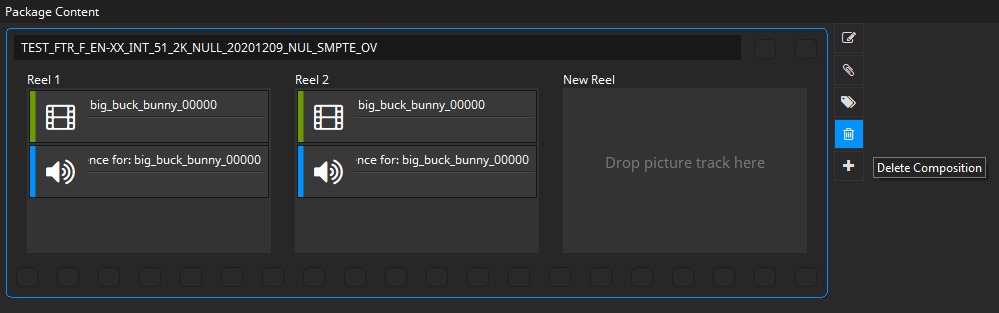
Deleting a composition is as quite as easy as creating one. Just choose the composition you want to remove from the DCP and hit the “Delete Composition” button in the tool bar. A composition is selected if there is a tiny blue frame around the composition. The following screen shot will show how a selected composition looks like:
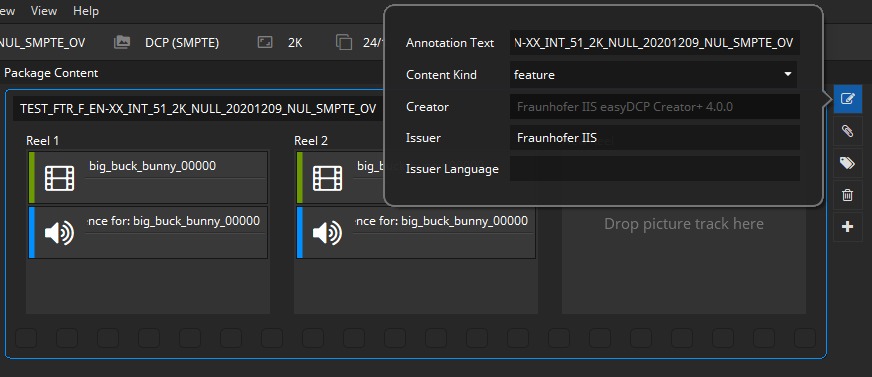
Composition Metadata#
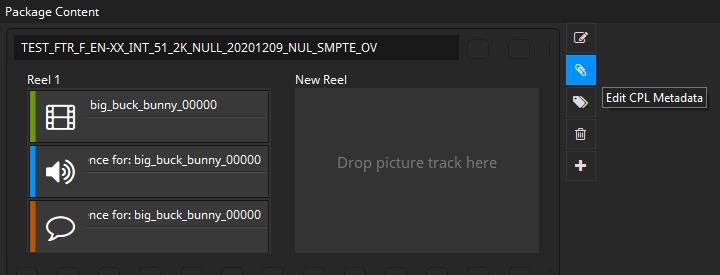
SMPTE DCPs support composition metadata which is used on some cinema servers to display informations. CPL metadata can be edited by clicking the icon in the composition manager and timeline.
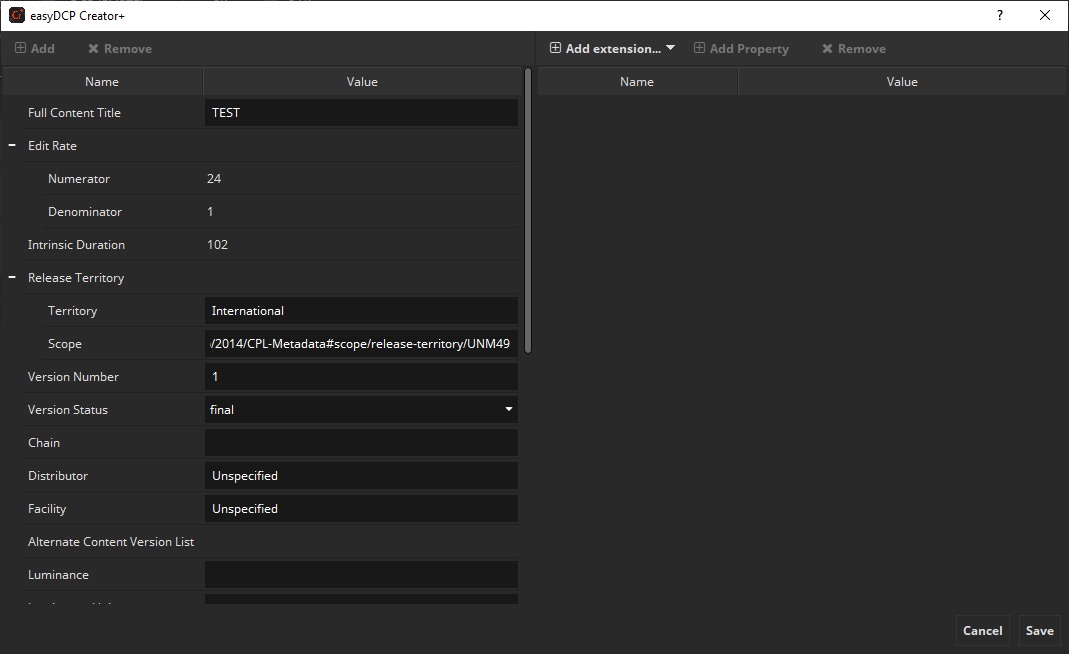
After clicking the CPL metadata dialog appears. Metadata that can be derived from the CPL will be filled in automatically. This affects e.g. edit rate and intrinsic duration. Other data has to be entered manually and so can be changed.
For certain features like Sign Language and Eclair color special extensions are provided. It is also possible to add arbitrary new extensions as key value pairs.
Preview package#
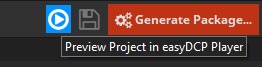
Before starting package generation, it is possible to preview the entire project in easyDCP Player. If you have installed easyDCP Player, just click on the “Play Preview” button in the upper right corner:
The easyDCP Player can directly play back project files (*.dcpproj) containing source files (e.g. DPX, WAV and Subtitle XML files), so it is possible to check e.g. audio and video synchronization before generating the package.