Playback#
When launching easyDCP Player+, a splash screen will be displayed during the start-up phase.
At the first launch of easyDCP Player+, a message will pop up, prompting you to request a server certificate. Each easyDCP Player+ installation has an individual server certificate, which will be created by Fraunhofer IIS. This certificate is required to be able to receive Key Delivery Messages (KDMs), which unlock encrypted DCPs. Please refer to chapter 9 for more details.
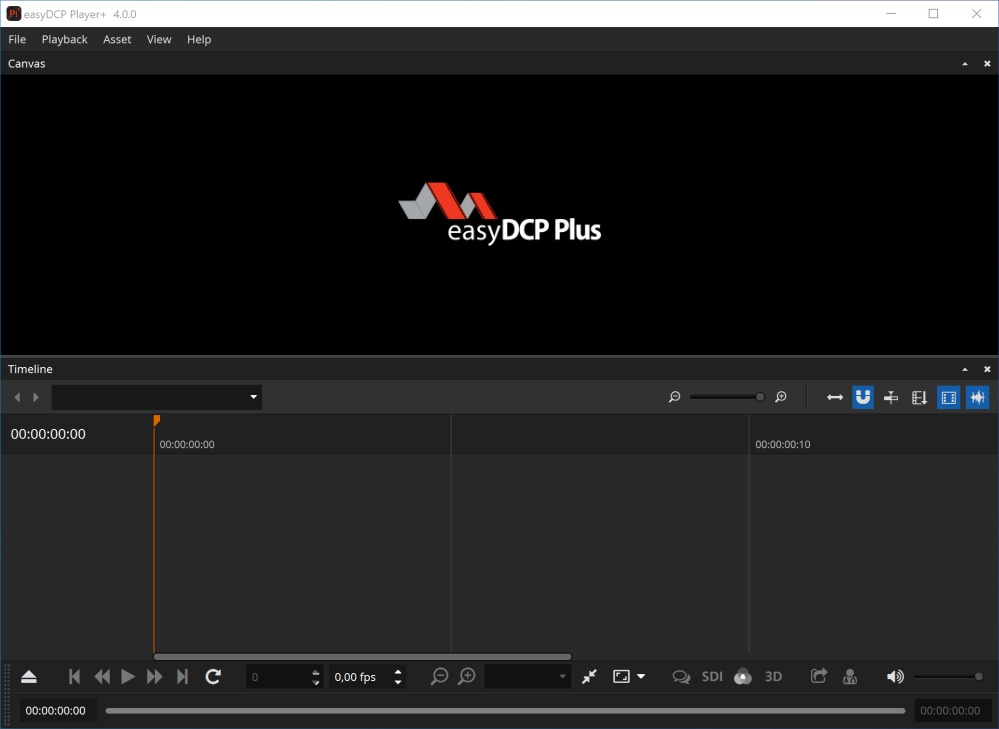
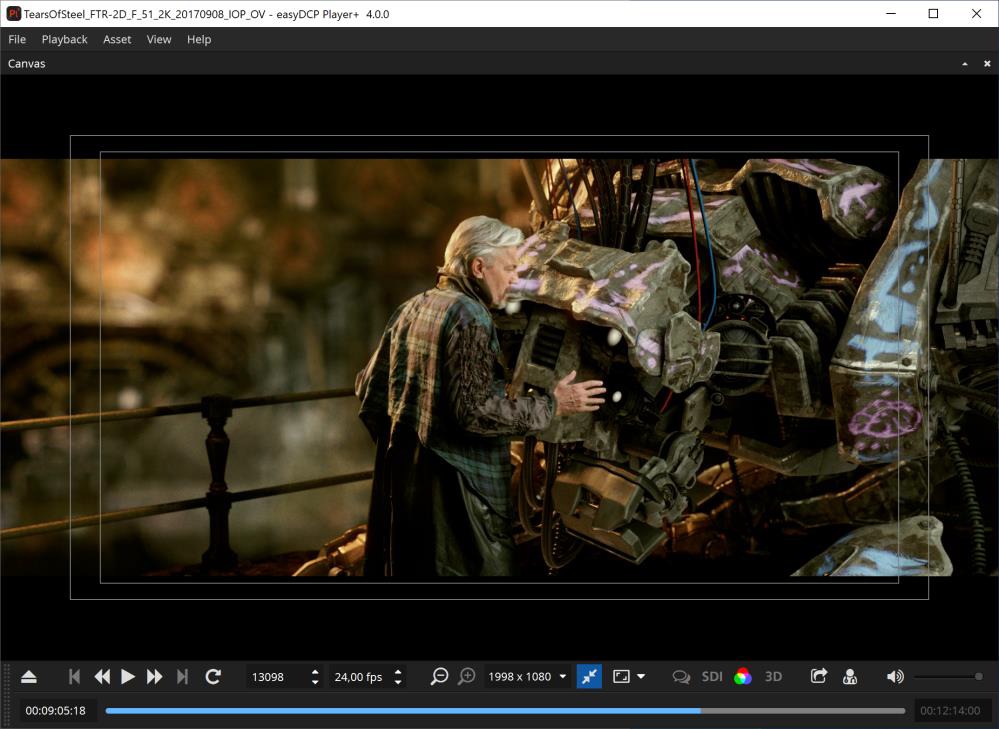
This is the main window:
Opening a DCP#
To open an existing package, click on the button with the eject icon in the bottom left corner.

For convenience you can also drag and drop supported sources directly onto the canvas, playlist editor or the playback toolbar, or onto the application icon to open a new instance. Supported sources are
one or more DCP folders
a CPL / Assetmap or PKL .xml file
a numbered file sequence (folder or first file) (see chapter 2 for supported file types)
*.mxf with audio and/or video essence
*.wav files
QuickTime files (*.mov, *.mp4, *.avi, *.mpg, *.mpeg)
a *.m3u playlist file
a DCP project file (*.dcpproj), created with easyDCP Creator+
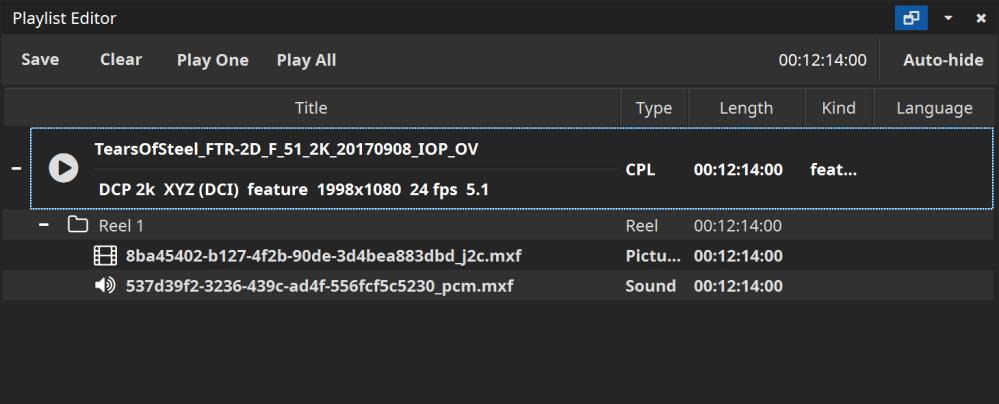
If one or more packages were opened, the playlist editor will pop up. It lets you select a single composition playlist for playback or arrange a playlist. You can always drag further assets into the playlist editor or re-open it from the context-menu.
For some of the fields, the tooltips contain more information or metadata like the creator, issue date, etc. You can also browse the XML or MXF files, or expand/collapse all items.
Opening a Supplemental package (VF)#
A supplemental package (typically ends with “_VF”, which stands for Version File) is an add-on container that does not contain all the track files it references, but relies on the presence of an additional package (typically one that ends with “_OV”, which stands for Original Version). The concept is well explained at www.digitalcinemanamingconvention.com/appendix_8.asp.
Often, the folder that contains the VF, resides within the folder that contains the OV, but other times, the two folders are located next to each other on the same level.
If a folder with an OV is opened, easyDCP Player+ will automatically detect any additional VF packages located within the folder and load them as well.
When only the VF is loaded into easyDCP Player+, the original location of all those track files that are not contained in it, is unknown. These track files, as well as the whole Composition is drawn in grey.
When the corresponding OV package is also loaded into easyDCP Player+, it will automatically resolve all missing references from the VF against the OV and the VF will become available.
Opening an encrypted DCP#
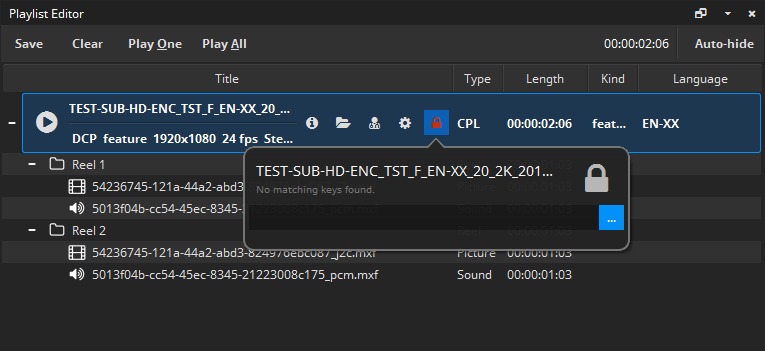
When an encrypted DCP is opened and the keys have not yet been ingested, the missing keys can be loaded from the corresponding Key Delivery Message (KDM) or easyDCP Digest (*.dcpdig) file. Either click on the lock icon or simply drag & drop the file into the playlist editor.
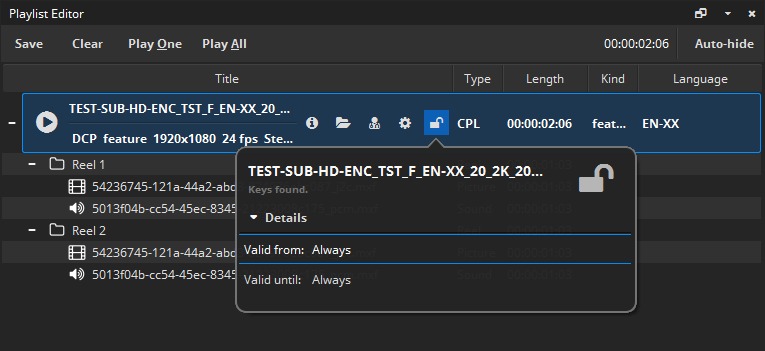
If the keys are read from a Key Delivery Message (KDM), they are only valid within a certain time window (“engagement window”).
Opening a DCP with sign language#
Since easyDCP Player+ 3.7 it’s possible to open and playback DCPs containing sign language [9].
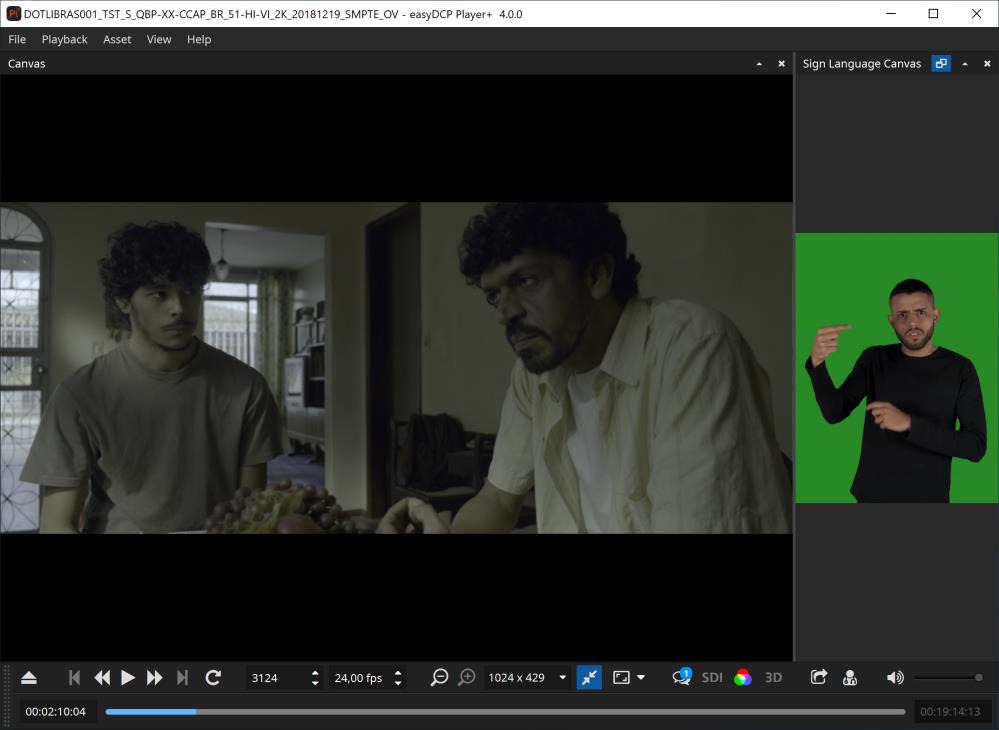
If present in the 15th channel of the audio MXF, the decoded video will be shown in a separate canvas. The sign language canvas can be opened via main menu -> Asset -> Sign Language Canvas.
Opening Audio/Video File#
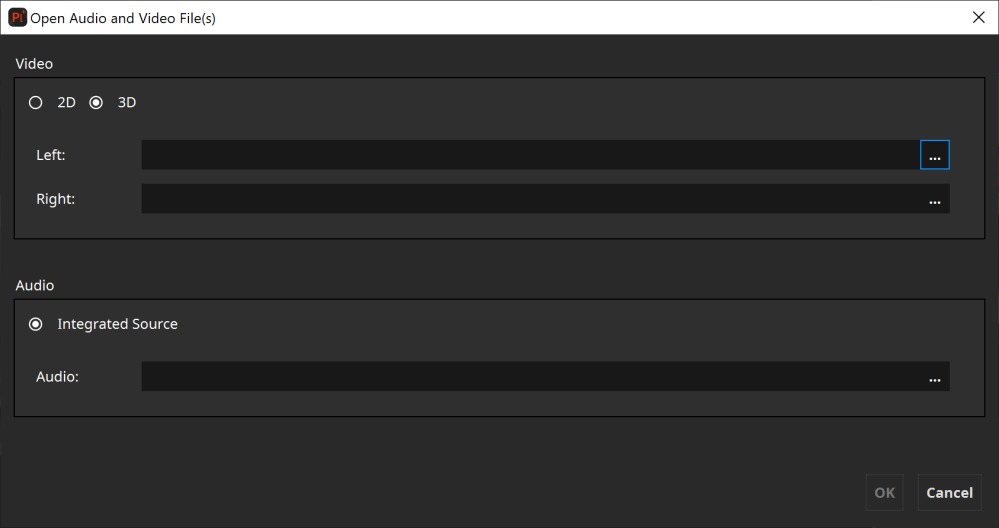
To open an existing media essence other than a DCP package (e.g. audio file, video file(s)), click on the button with the eject icon in the bottom left corner.

Here you can select single video and/or audio files. Currently supported video sources are numbered file sequences (select first file of the sequence), DCI-compliant MXF files with JPEG 2000 content or QuickTime files (*.mov, *.mp4, *.mpg, *.mpeg, *.avi).
Currently supported audio sources are wave files (*.wav) with uncompressed PCM samples or DCI-compliant MXF files with uncompressed PCM samples.
easyDCP Player+ also supports encrypted MXF files. When an encrypted MXF file is selected, a button with the key icon will become visible, allowing you to enter the decryption key. Content keys for individual encrypted MXF files are not looked up in the repository. You will always have to re-enter them, either by entering the key manually, or by re-ingesting the corresponding content key file (easyDCP Digest). The “OK” button will only be enabled when all fields are either empty or contain a valid essence.
It is also possible to combine two MXF files or file sequences to a stereoscopic video asset by clicking on the “3D” radio button.
It is perfectly possible to arbitrarily combine any two kinds of video sources: file sequence with file sequence, file sequence with MXF, MXF with MXF. If a stereoscopic MXF file is selected, only its first channel is regarded. If the same file sequence is selected for both channels, the sequence will be interpreted as two interleaved channels, i.e. frames at even indices will be used for the left channel, frames at odd indices for the right channel.
For convenience, supported file formats can also be dragged onto the easyDCP Player+ canvas or playlist editor.
Both video channels are required to have matching technical properties like edit rate and resolution. The shorter channel’s duration will be used as the overall duration.
Opening and Creating a Playlist#
easyDCP Player+ has limited support for playlists. Currently, only the m3u format is supported. To open an m3u file, drag and drop it onto the canvas or the easyDCP Player+ icon. Items will be played back to back. Enabling the loop button will cause the whole playlist to be looped, not individual items. Playlists may be nested, but not recursively nested.
A playlist can be created from within the Playlist Editor, with the “Save Playlist” option. The simplest form of a m3u playlist is a text file with one absolute path to a source asset per line. Optionally, each line may be preceded by a line with metadata that starts with “#EXTINF:”. It is followed by a number that denotes the maximum number of seconds the asset shall be played. A negative value or zero indicates that the full length shall be played. If the asset is shorter than the provided duration or the easyDCP Player+ demo’s maximum playback duration limit is reached, the duration stated in the playlist is ignored. Following the duration, separated by a comma, a title needs to be specified. However, easyDCP Player+ will continue to display the asset’s title and not the one stated in the playlist. A proprietary extension is that an additional, comma-separated, field, stating the audio volume, can be supplied. Valid values are numbers between 0-100. All blank lines and lines that start with “#”are ignored.
Sample:
#EXTM3U
# play only first 5 seconds
#EXTINF:5, title 1
\\server\DCPs\sample DCP\cpl.xml
# play at 50% audio volume
#EXTINF:0, title 2, 50
\\server\FileSequences\j2c\img_00.j
2c
C:\DCPs\sample DCP\video.mxf
Opening high-bitrate content#
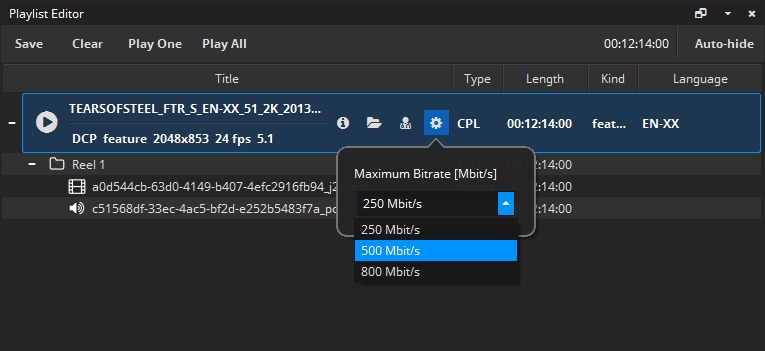
According to DCI specifications, the video bitrate for DCPs shall not exceed 250 Mbit/s. Surpassing that limit will cause easyDCP Player+ to generate a warning message. To set a custom limit, e.g. when working with high-framerate (HFR) content or high-bitrate (HBR) content, open the playlist editor window (Press “P” or context menu -> Playback -> “Playlist Editor”) and modify the bitrate setting. easyDCP Player+ will remember custom values set for each item across program starts.
Playback control#
Play/Pause Playback:
Starts or pauses playback of the currently loaded media asset (hit ‘Space’).
Loop Video:
When this option is activated, the currently loaded playlist will be restarted from the beginning when it reaches the end.
Discard resolution level:
By clicking this button, a resolution level of the JPEG 2000 code-stream will be discarded. Discarding a resolution level will half the resolution in both dimensions, while speeding up decompression times. Discard a resolution level, if the picture essence cannot be played back in real-time.
Add resolution level:
By clicking this button, an additional resolution level of the JPEG 2000 code-stream will be added. Adding a resolution level will double the resolution in both dimensions while slowing down decompression times.
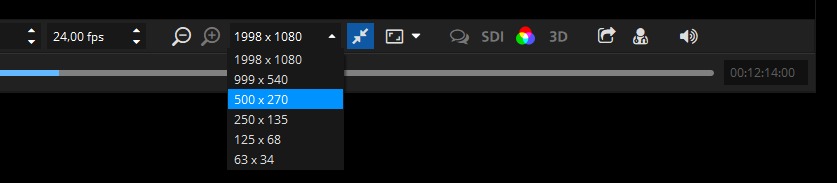
As seen above, a DCP contains multiple embedded resolutions.
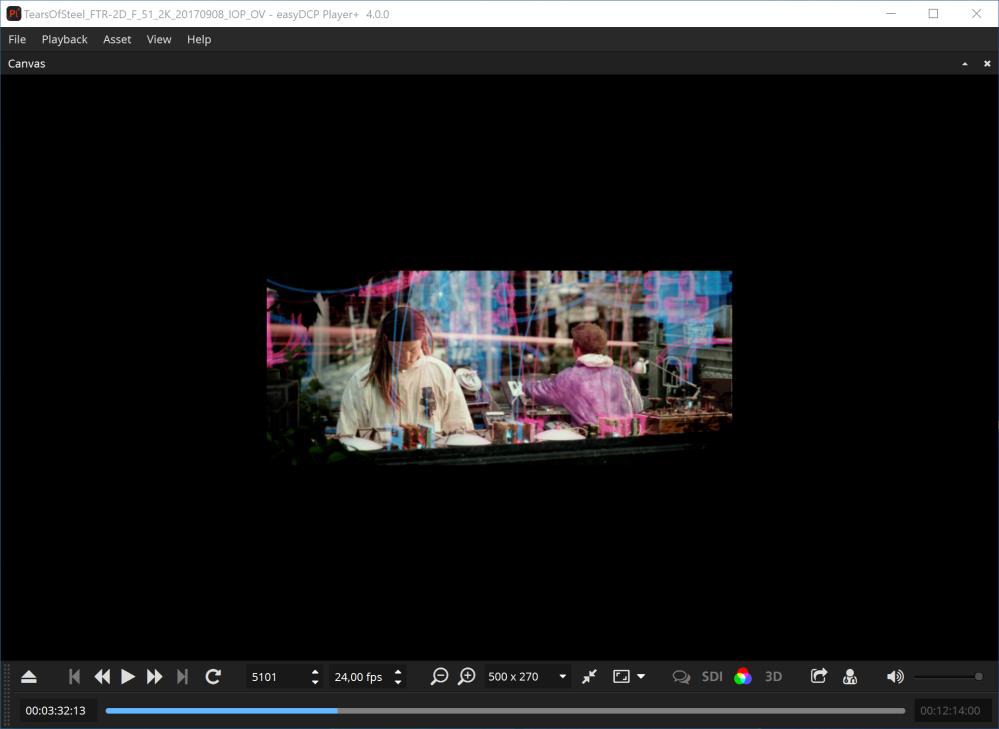
Fit to Window
This button is grouped with the resolution level buttons as well as the combo box listing all accessible embedded resolutions. Normally, the application window resizes itself to the decoded video resolution, which is always visible in the drop-down combo box displayed above. If the window is too small to fit the video resolution, scroll bars appear. When the “Fit to Window” button next to the combo box is checked, however, the displayed video resolution will be artificially scaled to optimally fit the current window size. Tip: In order to speed up the decompression, discard one resolution level and scale the resolution back up to full screen by enabling the “Fit To Window” option. The loss in quality may be acceptable in some cases.
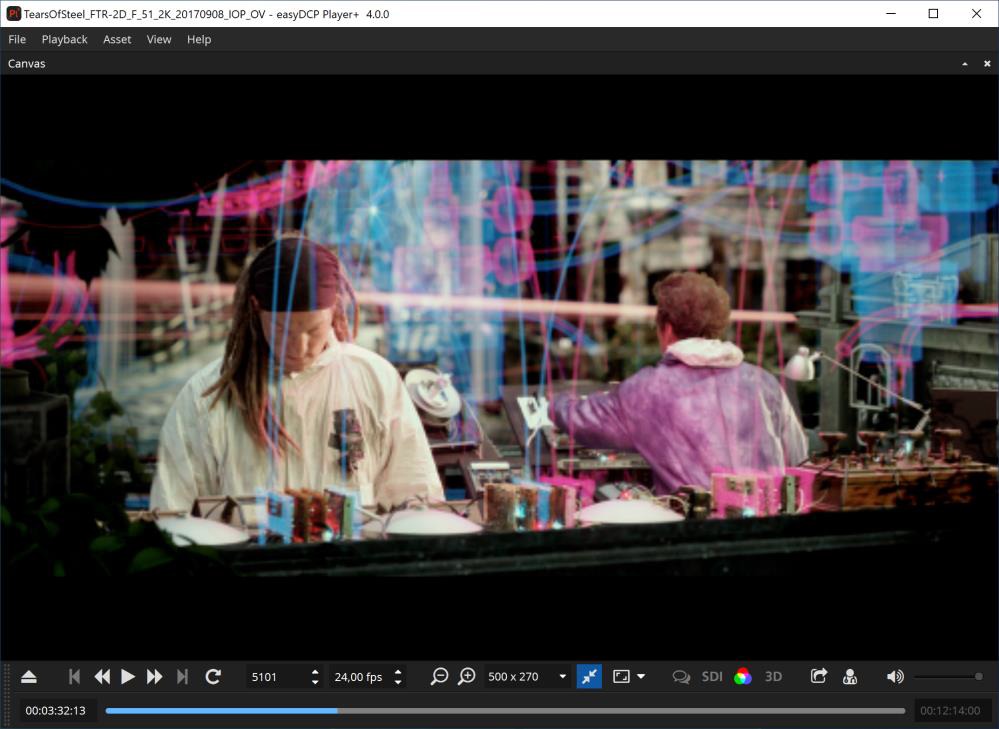
The above screenshot shows the same 512x214 pixels embedded resolutions, but with the “Fit to Window” option enabled.
Full screen
This button toggles the full screen mode of the video canvas. With the arrow button next to it, it’s possible to configure the target display device for full screen.
Frame number

Enter a value to directly jump to a specific frame number of the currently loaded asset. You can also use the blue slide bar to jump to a specific location.
Frames per second

Arbitrary frame rates can be specified. If the audio edit rate is known (as is the case when playing a DCP or MXF), audio will only be played for the original edit rate. If a fractional frame rate is specified, the time code display will round to the next even integer. Hence, the time code no longer matches the world time.
Timed Text
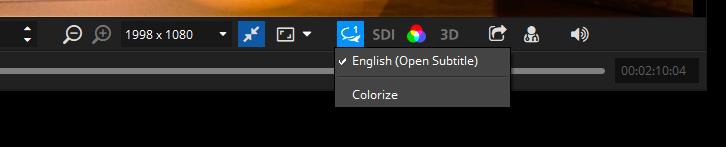
The currently opened package’s timed text tracks can be shown or hidden. To be able to distinguish the tracks they can be colorized. Further timed text related features are accessible from the Subtitle Inspector windows (refer to chapter 5.9 Subtitle Inspector).
SDI HDI-SDI output device
Select whether or not the video should also be played out over an SDI device. Support devices are Blackmagic Design UltraStudio, DeckLink or Intensity series devices. Advanced SDI options can be configured in the options dialog as described in chapter 8.3.
Color Trnsform
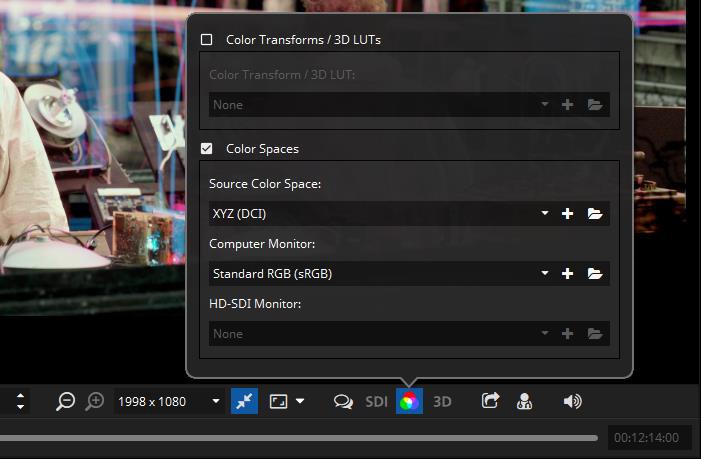
Setup the color spaces of the currently opened asset as well as of the computer monitor and/or SDI monitor. Please refer to chapter 5.11 for more details.
Export
Export or unwrap the currently opened asset. Please Refer to chapter 6 for more details.
Validate
Run a set of quality tests on the currently opened DCP and create a validation report. The button is only available when a DCP is opened.
Audio
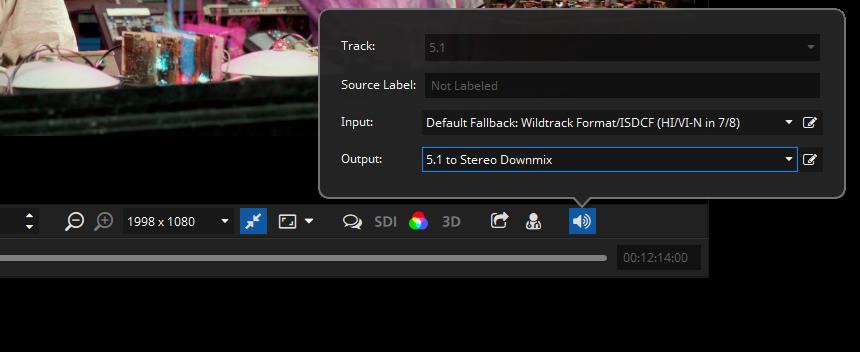
Within the audio popup it’s possible to select the active track of the currently loaded asset and the input and output audio channel mapping.
For more details about output channel mapping, please refer to chapter 8.2, and for audio routing in general to chapter 10.
Starting with easyDCP Player+ Version 4.3.0 the audio popup now supports the direct selection of Immersive Audio Bitstream (IAB) tracks.

If your DCP holds an IAB Track, simply select it here.
Media Slider
The timeline displays the playback progress of the current playlist item. Hovering over it will display additional information, clicking will jump to the associated time code. If the currently playing asset contains subtitles, markers will be drawn on the timeline at the fade-in points of all subtitle entries.

Multiple reels inside a single package will be drawn in slightly different colors for easier distinction. Additionally, the context entries in Playback->”Jump to” allow navigation between reels, subtitles or playlist items.
Timed texts are visualized as thin vertical bars. When hovering over a subtitle with the mouse cursor, the tooltip will display the text.

Subitile Inspector#
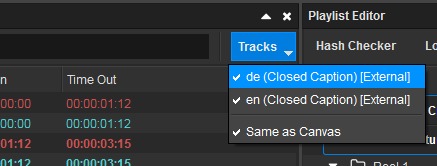
Since version 3.0 of the easyDCP Player+, a Subtitle Inspector window can be used to display subtitles and their properties for an opened asset. A Subtitle Inspector window can be opened by using the easyDCP Player+ context menu (right click on Canvas) or main menu -> Asset -> Subtitle Inspector #1 to #4 (or using the shortcuts CTRL+1 to CTRL+4). Each window can be used to show different Subtitle Tracks and search results. By default, the same subtitles like in the Canvas are shown in the Subtitle Inspector windows. To change this behavior, the “Tracks” menu can be used by disabling its “Same as Canvas” option and selecting the subtitle tracks arbitrarily and independently from the Canvas.
Additionally, the search box in the top of the window can be used to instantly find particular subtitle entries by typing in, for example, a part of their text or their time code. All visible columns will be searched and wild-cards like “?” and “*” can also be applied.
The order of the columns can be re-arranged via drag & drop of the column headers. The column headers’ context menus contain options to hide or show a particular column.
Selecting a subtitle in the Subtitle Inspector by clicking on it automatically jumps to the first frame the subtitle appears (please note that the subtitle could still have a high transparency in that first frame because of the fade-up time). The other way around, while playback is running, the subtitles that are currently visible in the Canvas are also marked in the Subtitle Inspector windows.
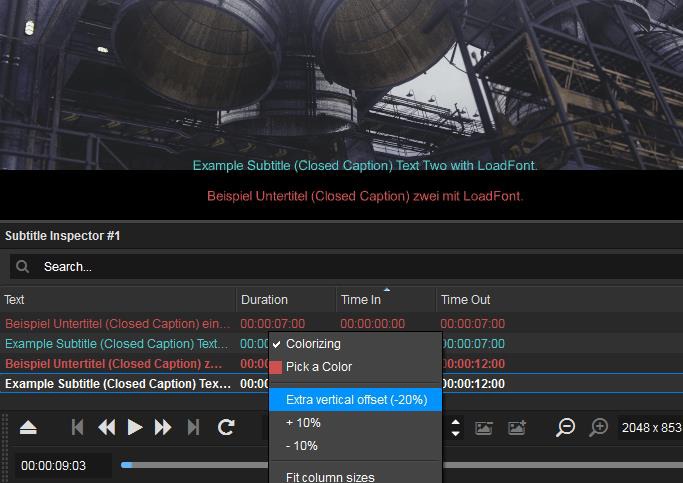
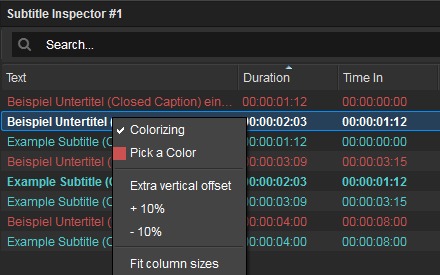
For testing purposes, each subtitle track can be rendered in a different color by either enabling the “Colorizing” option in the Subtitle menu of the tool bar or in the context menu of any subtitle entry in the Subtitle Inspector (right click on a subtitle entry to open up the context menu). Using this context menu, alternatively a custom color can be selected for each subtitle track by choosing “Pick a Color” for one of its subtitle entries. Moreover, by clicking on “Extra vertical offset”, each subtitle track can get an additional offset for its position in the image, so all of its subtitle entries get moved up or down in the image. This is convenient when comparing two alternative subtitle tracks (e.g. two different languages) that would normally overlap each other. The default percentage of +/-40% can also be customized in the context menu by using the “+10%” and “-10%” options.
Adding external subtile files#
easyDCP Player+ (+) can also load external subtitles on-the-fly via the playlist editor window. To do so, right click the desired package and choose “Add subtitle file(s) to Composition” or “Add subtitle file(s) to Reel”. Drag & Drop is supported as well.
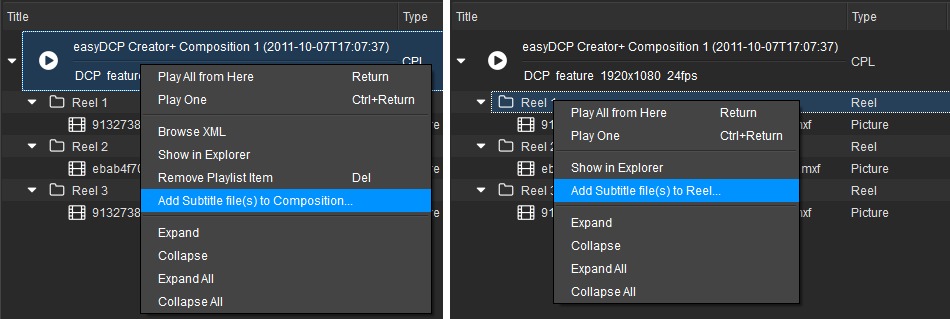
Please note that it makes a difference whether you drop the subtitle on the composition or on a particular reel. In case you selected to add the subtitle file to the composition and its length exceeds the duration of the first reel, the remaining subtitle contents will be added to the following reels (if any). When you later unwrap the package in the Export dialog (see chapter 6), the single imported subtitle file will then be split up into multiple files (one for each reel). “Add subtitle file(s) to Reel” will only affect the selected reel. Make sure that the subtitle contains no entries beyond the reel’s end.
To remove an external subtitle element, right click it and choose “Remove Subtitle” from the context menu.
For convenience, no distinction between the different supported subtitle formats (SMPTE DCP, Interop DCP) is made. For instance, adding SMPTE subtitles to an Interop package or vice versa will work as expected. When the package is exported, the subtitle format will automatically be converted.
You may add multiple subtitle files at the same time.
In order to distinguish them from regular ones, external subtitle elements in the playlist editor are displayed in italics.
easyDCP Player+ will automatically monitor external subtitle files for changes and update them accordingly (e.g. in case you modify the wording in an external editor)
Color Transform#
With this button you can select a color transform. Enabling a color transform results in a better representation of how colors and “look” appear on the screen. Multiple standard color transforms are included with easyDCP Player+.
Color Transform Presets
In versions prior to 3.3.2, color transforms were of the form “source space -> target space”. Each transform is represented by a file in the color transform repository. They use a proprietary XML format. The files can be edited and new ones can be added. These types of color transforms are still available for backwards compatibility. In the screenshot above, select the “Color Transforms / 3D LUTs” group box. The repository can be opened by clicking the folder icon. New files or 3D LUTs (*.3dl) can be added with the plus icon.
Color Space Presets Beginning with version 3.3.2, the more flexible way to define color transforms is by individually assigning source and destination color spaces. The source color space is specific to the currently loaded package and will be restored the next time the package is loaded. The first time a package is loaded, the source color space will be automatically inferred from the metadata. The destination color spaces can be individually selected for the computer monitor and for the SDI monitor. These selections will be permanently maintained. The color spaces are also represented by files that are located in the color space repository. The files are stored in a proprietary XML format that is different from the one used for the legacy color transform files. This repository is shared by both easyDCP Player+ and easyDCP Creator. Existing presets can be edited and new ones can be created. When adding new files, please make sure to assign a unique name. The “comment” attribute will be displayed as a tool tip. When creating a new preset it is recommended to copy and paste any of the existing presets and make adjustments as opposed to starting from scratch. All possible values can be looked up in the “template.xml.example” file located in the repository.
ICC Profile
Optionally, a separate ICC profile file can be referenced. This works with both the color transform and color space formats. The profile file needs to be located in the same folder. This profile will then be embedded when exporting QuickTime or TIF files to enable proper downstream color management.
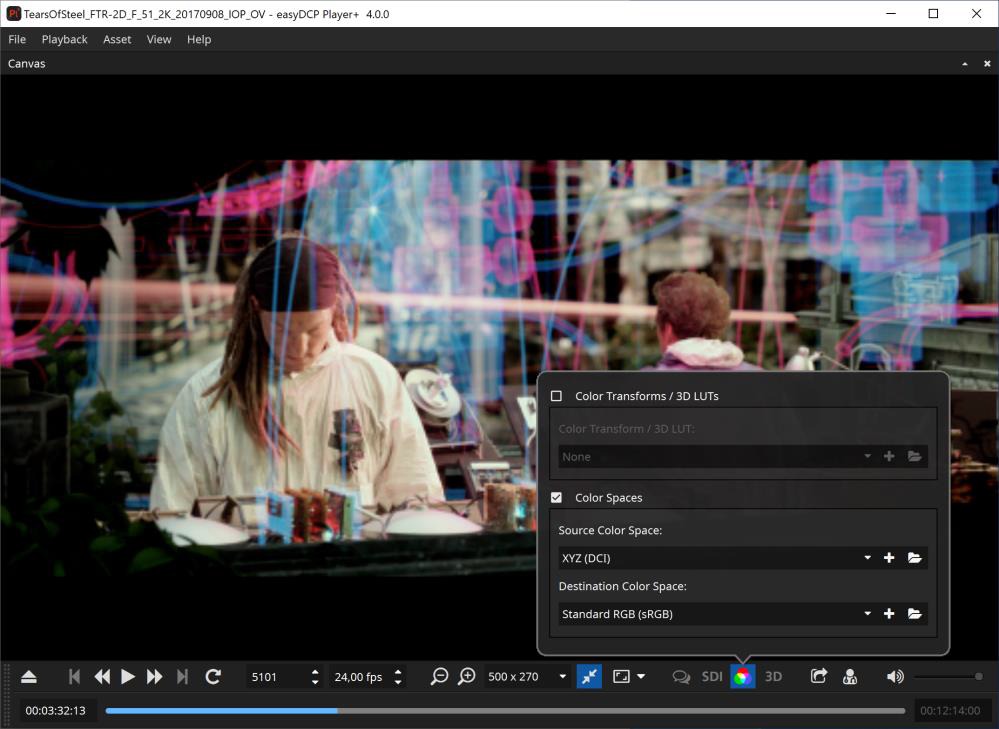
Example: DCP
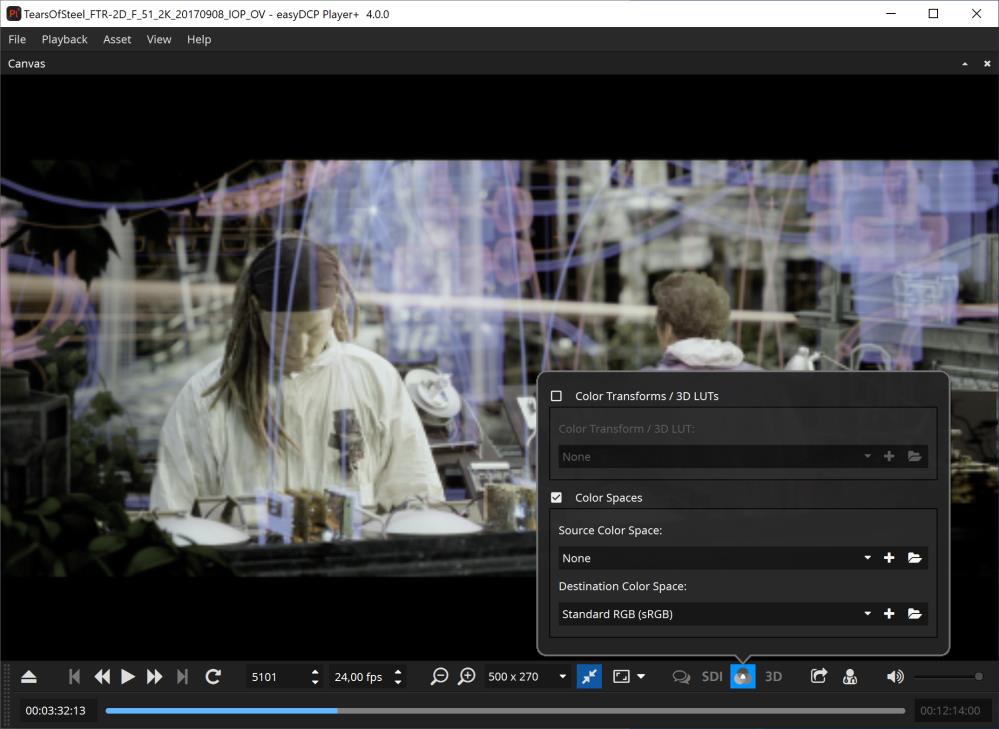
As seen above, images look greyish or greenish, when displayed in the package’s native X’Y’Z’ color space with 2.6 gamma and P3 white point. When viewing on a computer monitor with the sRGB color profile, the colors need to be converted into the sRGB color space.
2D/3D#
The 2D/3D context menu lists the same options as the 3D button in the detachable control bar. Features are only enabled when a stereoscopic asset is loaded.
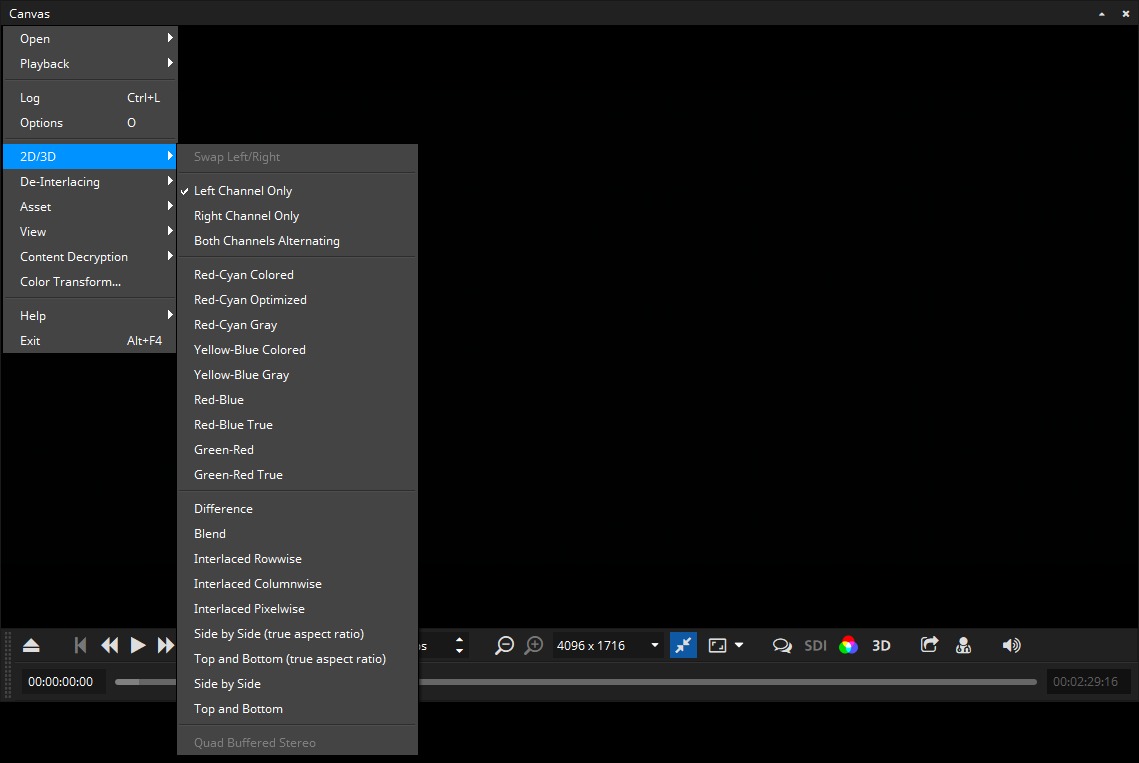
The “Swap Left/Right” check box works in combination with all following modes that display both channels. It swaps the input channels and should therefore normally be unchecked.
The first group of modes only displays one channel at a time.
The second group of modes lists several common anaglyph filters that can be used with widely available anaglyph glasses.
The third group contains a range of modes, most of which spatially interleave both channels or place them next to each other. Especially the side-by-side and top-and-bottom formats are common for addressing 3D displays.
Finally, Quad Buffered Stereo delivers the highest-quality 3D effect as it provides synchronous double-buffering for each eye. This option is only supported by professional graphics devices and therefore not always available.
In order for this option to be available the graphics device needs to support Quad Buffering and stereo needs to be enabled in the graphics device control panel as well as in the easyDCP Player+ video options pane. When this option is selected in easyDCP Player+, the graphics driver control panel is also the place to configure how exactly left and right images should be output. Common choices are output for shutter glasses or Dual-DVI stereo, e.g. left images over one DVI output and right images over the other DVI output. easyDCP Player+ simply passes left and right images at full resolution to the graphics driver.
Safe Areas#
Introduced in version 3.4.5, easyDCP Player+ can overlay “Title Safe” and “Action Safe” areas as well as the DCI containers Flat, Scope and Full.
Each preset is based on an XML file that are located in a directory which can be opened by selecting “Open Repository”. The “Title Safe”, “Action Safe” and “Center” presets are defined by specifying coordinates relative to the image. The remaining presets, on the other hand, are defined based on absolute coordinates. Based on the presets it should be straight forward to add additional custom presets, when required. They can either be copied into the directory where they will be detected by easyDCP Player+ after a restart or they can be imported by selecting the “Add new preset…” option. The colors or thickness cannot currently be changed. The overlays cannot be burnt into the image when exporting the DCP package.
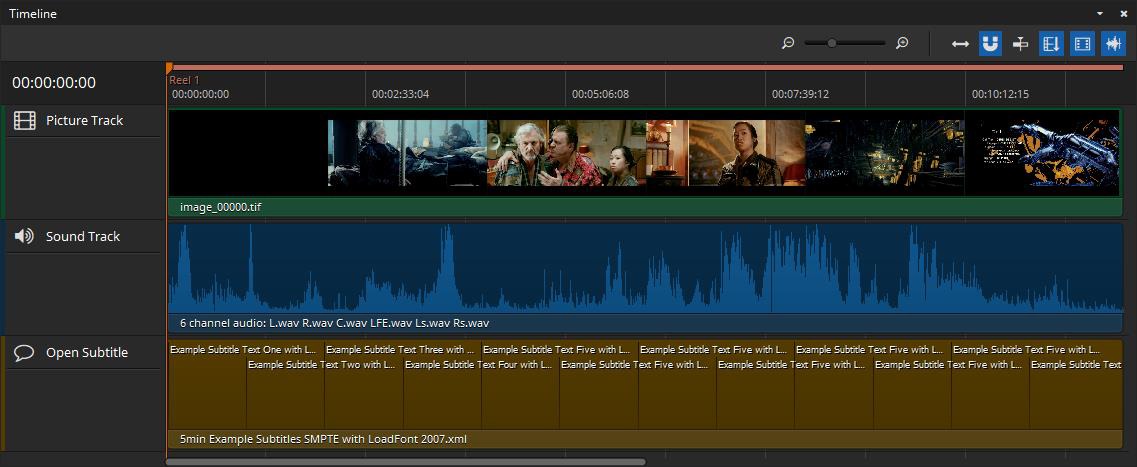
Timeline#
The timeline module was introduced with easyDCP Player+ 3.5.0. It can preview picture, sound and timed text tracks of a loaded composition.
You can open the timeline in easyDCP Player+ pressing keys “CTRL + T” or using the menu “View -> Timeline”.
Time Code Edit
The time code on the left side of the timeline is clickable and allows to jump directly to a specific time code. When it is selected it becomes blue and accepts all keys from 0 to 9. Pressing enter will accept the input and jump to the position in the timeline. It is also possible to start the editing via Ctrl + G after clicking the timeline once.
Zoom:
The two zoom buttons and the zoom slider control the zoom level of the timeline. Additionally zooming is possible with “CTRL / CMD + mouse wheel” while the mouse is over the timeline.
Zoom to fit:
Shows the entire timeline in respect to the available space in the user interface.
Snap to clip borders:
Helps to properly align the playhead at the clip borders.
Center view on playhead:
Auto-aligns the timeline so that the play head is placed in the center.
Render Reels / Segments:
When active, reel / segment borders will be shown in the timeline header.
Render picture thumbnails:
When active, thumbnails will be rendered for all video tracks in the timeline.
Render waveform thumbnails:
When active, a visual representation of each audio track will be displayed in the timeline. Depending on the length of the audio tracks the rendering of the waveform for the first time can take a while.
Navigation
Using arrow key left and right allows for frame wise stepping in the timeline as it does for Player in general. With arrow up and down it is possible to jump to the next/previous reel/sequence in the composition.