Export#
easyDCP Player+ allows exporting a source’s video, audio or timed-text assets.
The individual video frames can be unwrapped and saved as JPEG 2000 images (*.j2c) or decoded to uncompressed DPX, uncompressed TIF or a QuickTime container using any of the available installed QuickTime codecs. When exporting decoded images, various image processing options can be applied.
Since easyDCP Player+ 3.5.0 the export process is divided into a wizard. The necessary steps will be explained in the following sections.
Mode Selection#
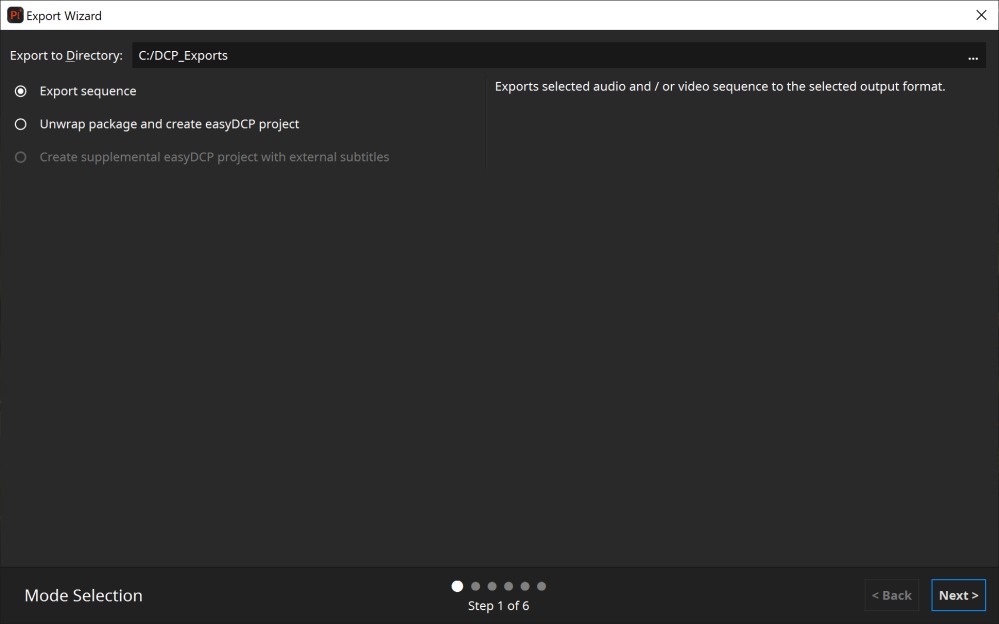
Unwrap DCP and create easyDCP project: easyDCP Player+ can simply unwrap the whole DCP track file by track file. It will automatically generate an easyDCP Creator project file, which can be opened with easyDCP Creator to generate a new package. Regenerating the exported DCP will be almost as fast as a copy operation since image files are already in the proper format and a time-consuming JPEG 2000 compression is not necessary. Just make sure that easyDCP Creator is configured to (1) disable JPEG 2000 re-encoding, (2) disable automatic pillar-/letterboxing, (3) bypass the video track files’ color transform. This option requires that keys were ingested for all compositions as it will unwrap the whole package. When extending an existing package, e.g. by adding subtitles, this option should usually be preferred over the “Export sequence” option.
Create supplemental easyDCP project with external subtitles: This option is only available if external subtitles were loaded. Exporting in this mode will create a easyDCP Version File (VF) project file to be opened by easyDCP Creator. The project will reference all track files from the original package. Any externally added subtitles will be split into reels and converted to SMPTE or Interop, when necessary. During the conversion, any subtitle attributes that use the default values defined in the specifications will be stripped.
Export Sequence: This option can be used to export a package’s content into image and audio files. However, it will skip the reels’ invisible frames, e.g. when the movie has a run-in. To work around this, it is also possible to load a package’s MXF files individually and unwrap those one by one. This is effectively what the “Unwrap DCP” option does.
Range Selection#
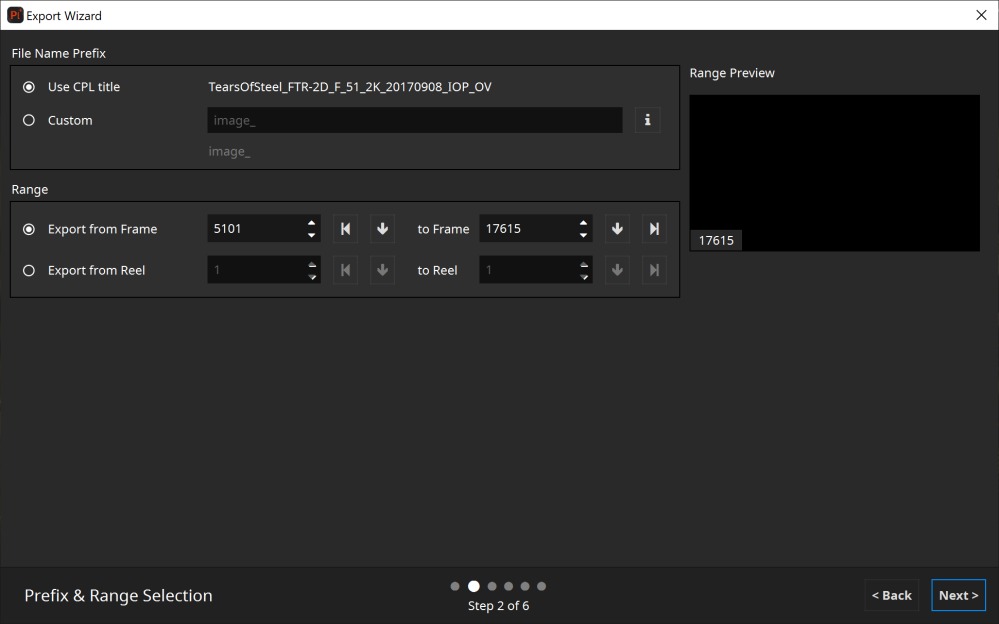
File Name Prefix: Will be used as the base file name. As a quick setting, the CPL title can be used as prefix. It’s also possible to define a custom prefix. All available options can be shown via the i button.
In- and Out-Points: Start and end points can be specified in terms of frame indices or reel indices. Exporting reels comes in handy when creating proxy file sequences to be used during the subtitling process, because subtitle files have to be provided individually for each reel.
Preview: The preview displays the first and last frame based on the configured range. For convenience, a few frames in between the configured range will be shown as well.
Video Setiings#
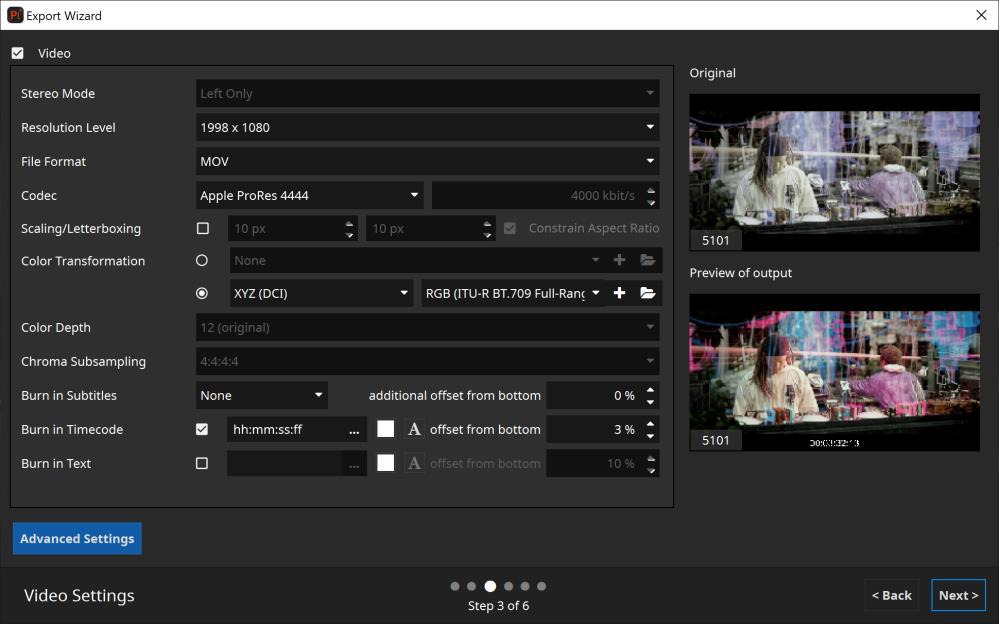
Stereo Mode: A stereo package’s left and right channel will be exported individually. Creating a stereoscopic QuickTime video is not supported.
Resolution Level: JPEG 2000’s scalability by resolution can be utilized to export proxy sequences.
File Format: JPEG 2000 (unwrap only), DPX, TIF or QuickTime. “Check (decode only)” is a quality assurance feature. It will decrypt and decode all frames in the package as fast as possible, verifying that the JPEG 2000 files are decodable, contain the proper profile flags and don’t violate the maximum bitrate assigned to the asset (250 Mbit/s by default).
Codec: When exporting to QuickTime, any of the installed QuickTime codecs can be selected (Audio and Video).
Scaling/Letterboxing: When exporting to QuickTime, the source can optionally be scaled and/or letterboxed. When enabled, the image will be scaled until either the width or height matches the desired resolution. If the output aspect ratio is different from the source, the remainder will be letter- /pillarboxed.
Color Transform: Any of the XML-based color transforms can be applied during the export. Please note, that this will impact the decoding performance.
Color Depth: For DPX, bit depths of 8, 10 and 16 bits as well as the native bit depth can be selected. Choose 10-bit for the highest compatibility with other tools. For TIFF, bit depths of 8 and 16 bits as well as the native bit depth can be selected. Export to QuickTime is restricted to 8 bits or 16 bits per color. The option to export to QuickTime in 16-bit mode will only be present when the source material actually exceeds a bit depth of 8 bits.
Chroma Subsampling: When exporting chroma-subsampled source material (i.e. in 4:2:2 or 4:2:0 configurations) to DPX or TIFF, 4:4:4 or the native subsampling scheme can be selected. In case 4:4:4 is selected, the video material will be up-sampled accordingly.
Burn-In Subtitles: Any of the present timed-text tracks can be embedded into the image. Optionally, the subtitles’ original positions can be shifted vertically. This comes in handy when creating new subtitles: a proxy file with the original subtitles burnt-in can be provided to the subtitler, who can add a new translated subtitle track and position it comfortably.
Burn-In Timecode: Allows to burn in the time-code.
Burn-In Text: Allows to burn in a static text, e.g. “Property of Fraunhofer”. Clicking the “…” button, will pop up an editor dialog that provides more space.
Preview: The preview displays all frames which will be used for export based on the configured range on the previous export wizard page. Furthermore, the preview reflects all settings made on this export wizard page (except “Scaling / Letterboxing”).
Audio Settings#
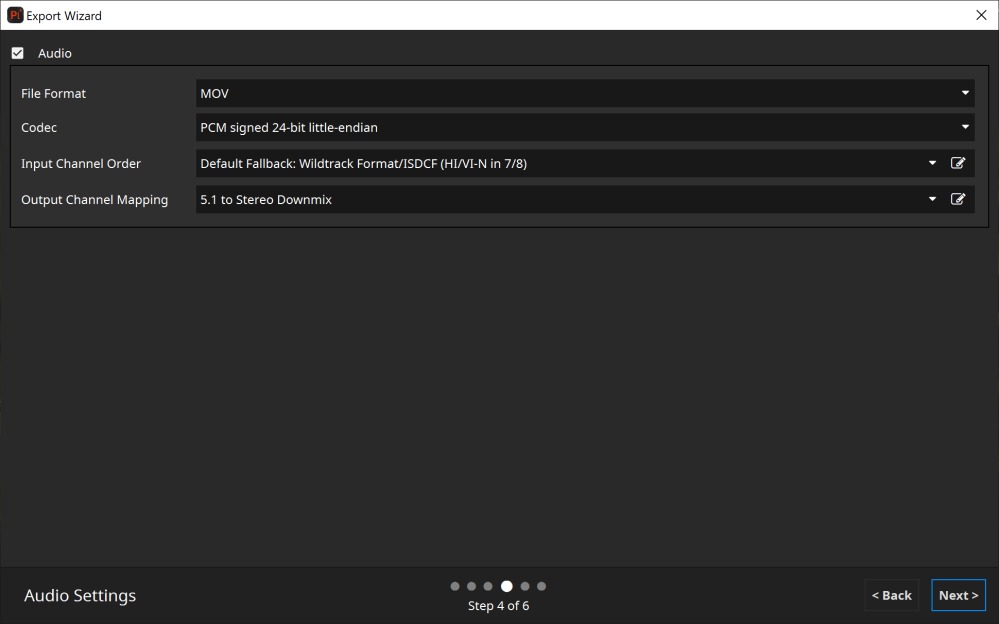
File Format: Audio essence can be stored as a single multi-channel WAV file, multiple single-channels WAV files or a in a QuickTime container. When the target wav-file exceeds the limit of 2GB file size, it will be split into multiple files. If both audio and video essence is exported using the QuickTime format, data will be interleaved into a single container file. Please note that depending on the selected codec, not all audio channel layouts might be supported.
Input Channel Order and Output Channel Mapping: Since easyDCP Player+ 3.6.0 it’s possible to configure the audio input channel order and output channel mapping for export. To do so select a preset from the existing list or click on the edit button next to “Input Channel Order” or “Output Channel Mapping” to define own presets. Please refer to chapter 10 for detailed information.
Summary
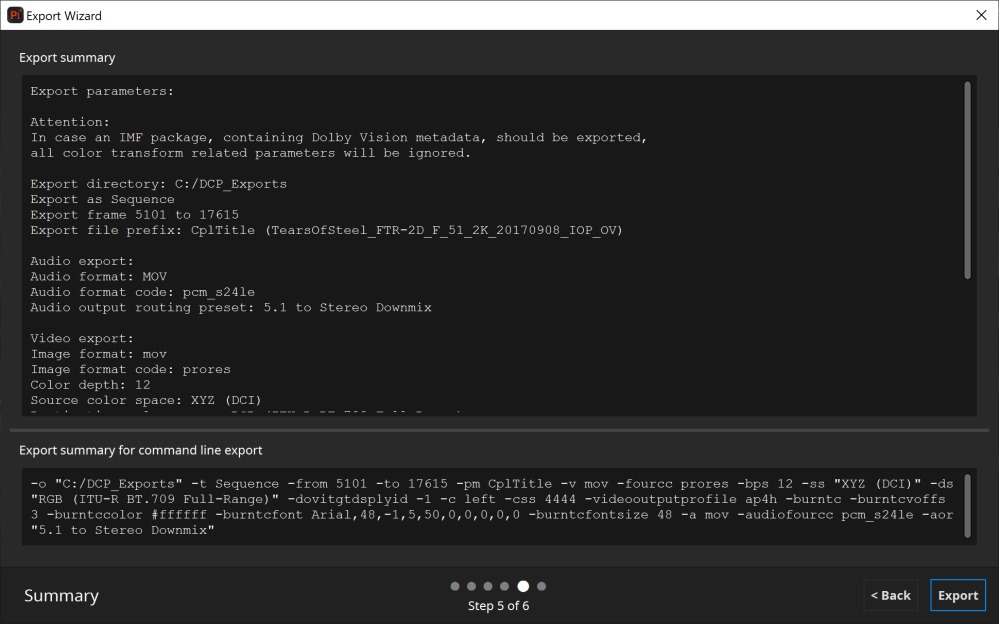
At the end of the export wizard a summary will be displayed. The bottom section displays the corresponding arguments to export the currently loaded asset via command line. Please refer to chapter 11 for more information regarding the available command line interface.